Sunday, 27 November 2016

Blog task

Throughout my time on this course so far, I have learnt many new things and developed upon my current skills. In the first project I worked on in 3D design, I took on an architectural approach to my project. This required me to use programmes such as Sketch up and Photoshop. Prior to this project I had no experience in using these programmes but after I gained a basic understanding and can now use these programmes without much of a struggle. I have also learnt how to manipulate a given object through 3D experimentation and recording process and how to analyse and visually communicate the function and form of a given object through the ‘3Rs’ project. By presenting my work in the form or presentation sheets at the end of project, I am now capable of presenting my work in a simple and effective layout.


I would like to improve upon my Photoshop skills, although I do have a basic understanding of all the tools and function, I find it difficult to manipulate an image and make it look realistic such as the photo shop edit I did in the first project. Something I would like to learn in the future during my course would be how to use other software programmes such as solid works and also how to 3D print.

Sunday, 20 November 2016

Still light Week 1 and 2

My new project 'Still Light' began with researching and creating a mood board on Pinterest of my given person who was Charlie Brown. By creating a mood board of Charlie Brown, I was able to pick out the different colours and shapes that relate to him such as yellow and black and the signature zig zag on Charlies t-shirt. The overall mood I felt when looking at my completed mood board was mellow and relaxed and this is the feel I wanted my final outcome to give.

'Love is looking out for your friends', Snoopy and Charlie Brown

After my research, I moved on to experimentation. As I had never worked with light before I wanted to explore the different ways in which light can work within 3D forms. I created a number of 3D forms and placed a LED light strip in them. I created different random shapes so that I had a variety of different forms to explore and experiment with. At this stage my design and ideas were diverse and spontaneous, some of my designs were rather abstract and I felt like the shapes I used in these designs fitted in well with the theme that I was going for. Something I found difficult during this process was creating a form that would hide the light source and give a clean and immaculate final outcome.


After testing my initial ideas with the LED light, I narrowed my ideas down. I really liked how the triangular structure worked as a body for my lamp. The light bounced off well on all corners and gave off a nice beam of light. I decided that I wanted the main design of the lamp to be the zig zag on Charlie’s t-shirt and I wanted my lamp to be a desk lamp. I wanted it to be aimed towards children and comic nerds so I had to keep my design funky and fresh.

I began to test out some of my designs to see how they would work. The first design I tested out was a sphere made from wire with a zig zag hanging from the middle which would be the light source. Once I finished making this model, I decided I didn’t really like it, it didn’t work as a desk lamp and reminded me too much of a globe and the design wasn’t very stable. 


I then created another design, this one was formed of three long triangle prisms to form a triangle, this design was very abstract and unique and I felt like it worked really well so I decided to develop upon this design.


To make my design relate to Charlie Brown, I wanted my lamp to have a strong graphic touch to it, so I decided to create the triangle prisms out of clear acetate and border it with a thick black tape. I feel like this worked really well. The clear acetate gave the design a minimalist touch.


Overall I was pleased with my final outcome, It looked interesting and fitted in with the theme I going for. However something I would improve about my design would be making sure that the light source was hidden away and not visible so that the final lamp looks immaculate and not messy.


Sunday, 6 November 2016

Fixtures and Fitting Week 2

After a week of inspiration, I started to plan out my final outcome. I developed upon my objects and did some sketches with tracing paper to generate more ideas. This process was fun and experimentive. I focused on picking out the different shapes and angles within my objects so that I could develop them into a structure for a building. 


One image I took of my objects stood out to me the most and I decided to develop upon it. The image initially looks like a bundle of mess but I managed to form a design of an architectural structure out of it.

After this stage, I decided what I wanted the building I was designing to be. I came up with the idea of a house built for an artist. The house has two sections, one being the living space and the other being a working studio. The main structure is made from cross-laminated timber. The large windows also provide natural light to flood the interior. I worked on some sketches on sketch up.


The next step for me was creating my building. I created a net on card and cut it out to see if it all fits together and to see if my final outcome needs any amending. I was pleased with how it turned and out and then I created my final outcome. I used foam board to represent the timber; this was an easy material to work. Overall this project was a great start into my pathway, I became familiar with programmes such as Photoshop and sketch up and I developed my skills. My final outcome is presented below in my presentation sheet.


Sunday, 30 October 2016

Fixtures and Fittings Week 1 & 2

I started off this project by creating random shapes and forms using various different types of materials, some of these objects were rather peculiar and some were just simple forms. This task allowed me to work freely and be experimental. I had no plan of what I was making and this was great as it allowed me to be creative and it gave me endless possibilities of different outcomes. After creating a variety of objects, I photographed them in different angles and joint some objects together in a bundle to form different shapes out of them. Arranging the different objects in different positions together allowed me to start thinking about possible structures that I could create from them such as a structure for a building. I also experimented with light and created shadows with my objects.


Towards the end of the week I went on a trip to Shoreditch to look at several buildings to source inspiration for my project, this was helpful as I was heading towards the architecture route and wanted to create a building of some sort. The intriguing structures I saw inspired me and I recorded my what I saw through pictures.


After a week of inspiration, I started to plan out my final outcome. I developed upon my objects and did some sketches with tracing paper to generate more ideas. This process was fun and experimentive. I focused on picking out the different shapes and angles within my objects so that I could develop them into a structure for a building. 


One image I took of my objects stood out to me the most and I decided to develop upon it. The image initially looks like a bundle of mess but I managed to form a design of an architectural structure out of it.


After this stage, I decided what I wanted the building I was designing to be. I came up with the idea of a house built for an artist. The house has two sections, one being the living space and the other being a working studio. The main structure is made from cross-laminated timber. The large windows also provide natural light to flood the interior. I worked on some sketches on sketch up.


The next step for me was creating my building. I created a net on card and cut it out to see if it all fits together and to see if my final outcome needs any amending. I was pleased with how it turned and out and then I created my final outcome. I used foam board to represent the timber; this was an easy material to work. Overall this project was a great start into my pathway, I became familiar with programmes such as Photoshop and sketch up and I developed my skills. My final outcome is presented below in my presentation sheet. To improve, I feel that I could have done a better job at the Photoshop edit on my presentation sheet as i got all the proportions wrong.


Friday, 7 October 2016

Fashion Textiles and Promotion


Day 1

Today was a very interesting day. We started the day off by printing off an image of any type of art work. I chose a classical painting by Pablo Picasso because of the interesting colours and shapes in it. We then had to create three objects out of paper inspired by our image. My image had quite a lot of triangle and square shaped within it so that was my main inspiration for my three objects. I created a 3D triangular object, a triangle with flowers on the top inspired from the flowers in the background of the painting and last of all I created a tall cylinder with slits in which i inserted triangles. We then had to photocopy one object of our choice 20 times and then join up with a few other people and work together using our different shaped to create an outfit on the mannequin.


Overall i was really pleased with my groups final outcome. All the different shapes worked well together. I feel like it was a rather daring and sexy outfit.

Day 2

On the second day of fashion textiles, we created outfits on a model using paper. This was really fun and it allowed me to be very experimental as i was working in a much smaller scale than usual. I worked with different shapes and compositions. My favourite outfit was the middle one, especially the top half of it, i love how fierce and daring the triangles look. 


We then had to brainstorm ideas and come up with an piece of clothing that we had to create the following day. I wanted to stick with my idea of the triangles. At first i thought of creating a simple skirt but I wanted to create something a little more complex that would stand out so i decided to create a bra. I started of with two triangles attached to some string and i built upon this. I added two more triangles to create cups for the breasts and then i covered the bra in triangles of all different sizes. In the end the shape sort of reminded me of a pineapple.


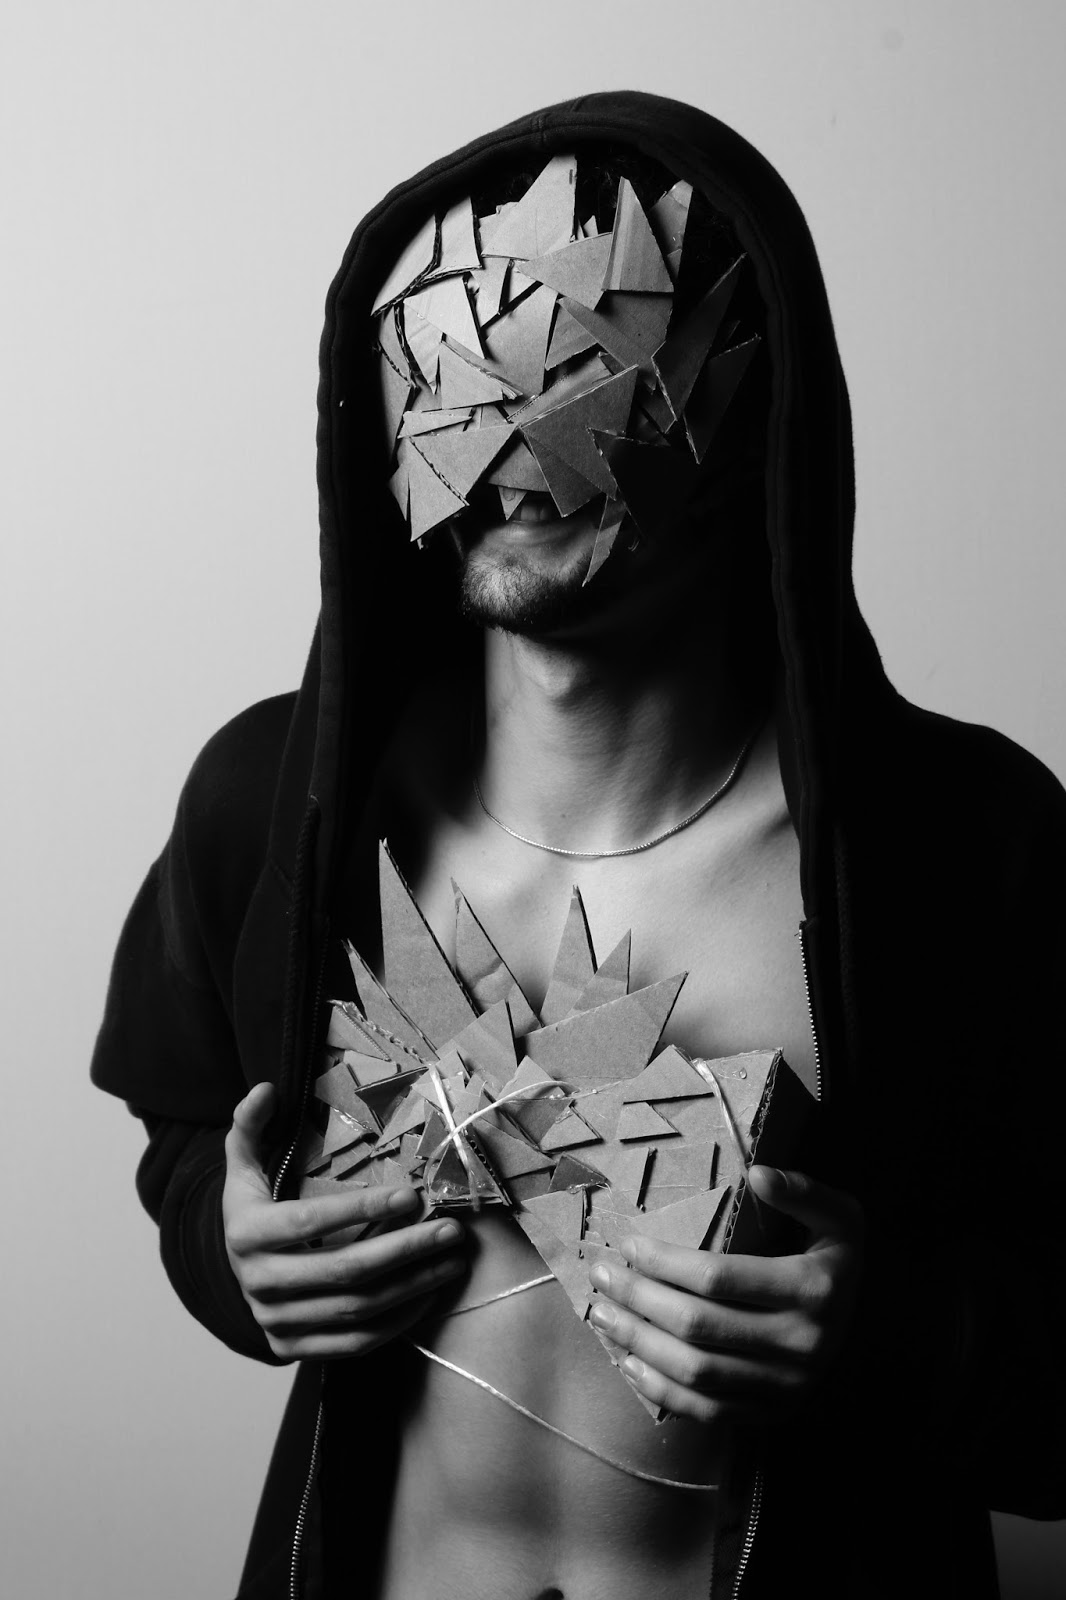
My final item was then model'd and i think the pictures came out amazing. The black and white adds to the mood of the clothing. A peer of mine created a mask with the same design of triangles as my bra so we decided to model the two items together and i think this looks even better. It seems as if they are made to be worn together. My favourite shot is the fourth one. The black hoodie works with the savage and dark feel of the bra and mask.


Wednesday, 28 September 2016

Lens based Media Week.

Day 1

On the first day our task was to create a vine clip showing change. In a small group we created a short clip of Glen transporting to the other side of the building within a split second. There was a nice and simple story line to it and the clip had quite some humour to it. Everybody really enjoyed it when we showed it to the class.


For the second task we had to work in the same groups but this time create a short thirty second clip showing a problem that couldn't be resolved. For this film we decided to create a crazy lift situation. The film started of with one person in the lift who is sane and then one by one more people enter the lift who are crazy and are acting crazy and in the end it turns the one sane person crazy too. This film too had a creative story line and humour to it. I think overall this scene worked very well, it was straight to the point and interesting to watch. Also the fact that the scene starts off with the lift at floor 0 links in with the video, the 0 is a loop and the loop could represent craziness. I think to improve we could of included everybody in our group in the film as there were 2 people who were not included, more people in the lift would have created for chaos and would have added to the drama.

                                                              Click here for video clip.

Day 2

The next day we used stop motion to create a short film showing change. We looked at the works of Jan Svankmajer and Cyriak to understand what we were trying to achieve. Working in pairs, me and my partner created a short film of a worm who crawls out of an apple and ends up turning into a butterfly. The clip is short and sweet and works well. I think for my first ever stop motion film, i did well and i overall really enjoyed the task.


For the next part of the day we joined up with another pair and created another stop motion animation but we had to show a change from a 2D world into a 3D world. My group and I came up with the idea of turning one of our team members into a character who starts out in a 2D world (paper) and crawls out into the 3D world (reality) and is amazed by his surroundings. I think the story line was a great idea however i think our clip  is quite messy and we could of made it better but it still works and the class really loved it.

Click here to watch.

Day 3

Today we focused on still image rather than moving. We looked at the works of artist who focus on different aspects of photography such as line, texture, depth of field, symmetry, shadow and light. We then took the challenge to take pictures of our own that fall into these categories. This was a really great task as I learnt a lot photography and i took some really lovely photos.